
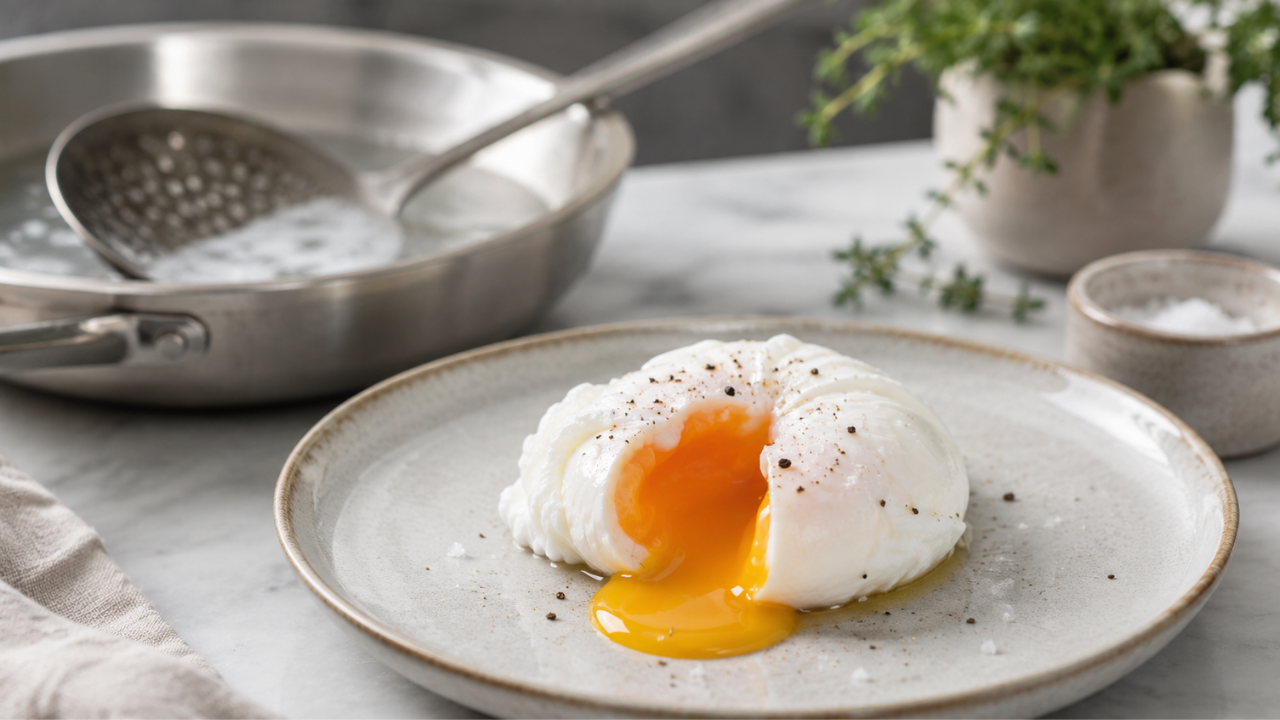
Of all the ways to cook an egg, poaching is one of the clearest tests of temperature control.
The method looks simple: an egg, water, and a few minutes. But the difference between a clean poached egg and one that falls apart in the pot usually comes down to one misunderstood variable: heat.
Poaching is built on gentle, steady temperature. The water needs to be calm enough to protect the egg as it sets, but hot enough to cook the white before the egg spreads apart. When that balance is right, the white sets tenderly around the yolk, and the yolk stays warm and fluid at the center.
When the water is too hot, too active, or poorly controlled, the result changes quickly. The white scatters into wisps, the yolk can break, and the egg loses its shape before it ever reaches the plate.
That is why poaching is not really about memorizing a trick. It is about learning to read the water, understand what heat is doing to the egg, and make small adjustments before the technique gets away from you.
This article explains how poaching works, what the water should look like, why egg freshness matters, when vinegar helps, and how to avoid the common mistakes that lead to watery whites and broken yolks. Once you understand the principle, poaching becomes much less fragile and much more repeatable.
What Poaching Actually Means
Poaching means cooking food submerged in liquid just below a simmer. The liquid is hot enough to gently cook the food, but not so hot that it tears, toughens, or agitates it.
For eggs, that usually means water at 160°F to 185°F (71°C to 85 °C). This is the working zone where the white can set while the yolk stays warm and fluid.
The water should look calm. You may see small bubbles forming slowly at the bottom of the pan, but the surface should barely move. That stillness matters. It protects the egg during the first moments of cooking, when the white is still fragile.
Poaching is often confused with simmering and boiling. They are related techniques, but they are not interchangeable.
| Poaching | Still, with slow bubbles | 160°F to 185°F / 71°C to 85°C | White sets gently, yolk stays fluid |
| Simmering | Steady movement, small bubbles | 185°F to 205°F / 85°C to 96°C | White firms quickly, yolk may begin to set |
| Boiling | Rolling, active bubbles | 212°F / 100°C | White tears, egg loses shape, yolk cooks more quickly |
For poached eggs, that difference is everything. A simmer can firm the white too quickly, setting the yolk. A boil can tear the white apart before it has time to gather around the yolk.
Poaching is also not steaming. The egg must be surrounded by liquid, not suspended above it. Egg poaching cups and silicone molds can be useful, but they produce a steamed-egg texture rather than a traditionally poached one.
Sous vide eggs are different again. They rely on sealed, precisely controlled water baths and produce a different texture and endpoint.
The rule to remember is simple: the liquid should never boil while the egg is in the water. Not at the beginning, not halfway through, and not just for a few seconds. Once the surface becomes active, the water is no longer protecting the egg. It is working against it.
Chef’s Note
If you do not have a thermometer, read the water visually. At poaching temperature, the surface should barely move. You may see small bubbles forming and rising slowly from the bottom of the pan, but you should not hear active bubbling. When the water looks quiet but alive, you are in the right zone.
How Temperature Shapes Egg Texture
- UPGRADED PROBE FOR FASTER, MORE STABLE READINGS – This meat thermometer features a precision-upgraded probe with higher …
- NIST CERTIFIED ACCURACY – Trust your cooking with our NIST certified meat thermometer digital, ensuring high accuracy of…
- IP67 WATERPROOF PERFORMANCE – Grill, bake, or barbecue without worry! Our IP67 waterproof design means you can easily cl…
An egg is not one uniform ingredient. The white and the yolk are different parts of the egg, and they respond to heat differently.
Understanding that difference changes how you approach poaching. You stop waiting for a timer to tell you what happened, and you start reading what the egg is doing in the water.
Egg whites begin to set at a lower temperature than many cooks realize. As they heat, the proteins unfold, connect, and turn from clear to opaque. Around 140°F / 60°C, the white begins to coagulate. Around 160°F / 71°C, it becomes opaque and set enough to hold its shape.
The yolk changes more gradually. It begins to thicken around 150°F / 65°C, but it can remain soft and fluid when the cooking time is short and the heat is controlled.
This is why the poaching range matters. The water must be hot enough to set the white, but gentle enough that the yolk does not cook through before the egg is lifted.
| 140°F / 60°C | White proteins begin to set. The white is still translucent and fragile. |
| 160°F / 71°C | White becomes opaque and set enough to hold its shape. Yolk remains fluid. |
| 170°F / 77°C | White firms further. Yolk may begin to thicken at the outer edge. |
| 185°F / 85°C | Upper end of the poaching range. White is fully set and beginning to tighten. |
| 212°F / 100°C | Full boil. Turbulence tears the white before it can set cleanly. Continued cooking firms the yolk and toughens the texture. |
At a proper poaching temperature, the white sets first. It gathers around the yolk, becomes opaque, and forms a tender structure. The yolk, protected at the center, warms more slowly and stays fluid.
That is the texture you are trying to produce: a fully set white with a warm, runny center.
When the water is too hot, two things happen at once. The white tightens too aggressively, and the water’s movement pulls it apart before it can form a clean shape. The yolk also begins moving toward a thicker, more set texture.
The result may still be edible, but it is no longer the soft, controlled texture that defines a good poached egg.
Chef’s Note
Poaching is not just about cooking the egg. It is about controlling heat so the white and yolk reach different endpoints at the same time. The white should be fully set. The yolk should remain fluid. The only way to control both is to control the water around them.
Where Gentle Egg Cookery Appears Across Kitchens
Poaching is not limited to a single cuisine or dish. The same basic principle appears across many kitchens: use gentle heat to set the egg white while keeping the yolk soft, fluid, or custard-like.
The liquid may change. In one dish, it may be water. In another, it may be tomato sauce, broth, or a carefully controlled water bath. What matters is not only the dish’s name. What matters is the way heat is managed.
In oeufs pochés, the French reference point, the egg is cooked directly in gently heated water. The technique depends on controlled temperature, careful entry, and stillness.
In eggs Benedict, the poached egg has to hold its shape through plating and saucing. A weak or ragged poached egg will not hold up well in the dish, which is why temperature control matters so much.
In shakshuka, eggs are cooked gently in spiced tomato sauce rather than plain water. The method is not identical to classic poaching, but the principle is closely related: the heat must be gentle enough to set the egg without toughening the white or overcooking the yolk.
In broth-based egg dishes, the egg sets in hot liquid rather than dry heat. The result depends on the same judgment: the broth should be hot enough to cook the egg, but not so hot that it breaks the texture apart.
In onsen tamago, the egg is cooked at a carefully controlled low temperature while still in its shell. This is not poaching, but it reinforces the same lesson: small temperature differences create very different egg textures.
The pattern is the point. In these dishes, a soft yolk is no accident. It is the result of controlled heat. When the liquid is too hot or too active, the egg tightens, scatters, or cooks through. When the heat is gentle and steady, the egg can set cleanly while the yolk stays soft.
Chef’s Note
When you lower the heat before adding eggs to shakshuka, you are using the same judgment required for a poaching bath. The dish is different, but the cooking decision is the same: protect the egg from aggressive heat.
Reading the Water Before the Egg Goes In
Understanding poaching is one thing. Standing at the stove with a pot of water and an egg in your hand is another.
This is where the technique becomes practical. Before the egg goes in, your job is to read the water. Most poaching problems begin before the egg ever touches the pan.
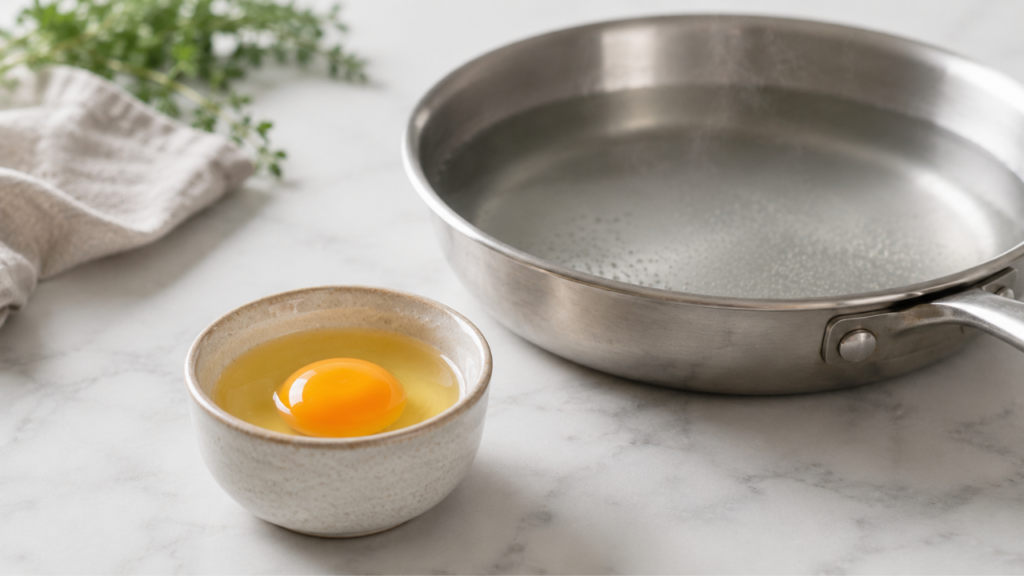
The water should be hot, but calm. Look for small bubbles forming slowly on the bottom of the pan. A few may rise gently, but the surface should barely move. You may see light steam, but you should not see active bubbling.
A proper poaching bath is almost quiet. If the water is making noise, it is probably too hot. If the surface is shuddering, bubbling, or moving on its own, lower the heat and wait before adding the egg.
| Small bubbles | Bubbles forming slowly on the bottom of the pan | The water is hot enough to begin setting the egg |
| Calm surface | Little to no movement at the top | The water is gentle enough to protect the white |
| Light steam | Thin wisps rising from the surface | The water is hot, but not boiling |
| Near silence | No active bubbling sound | The water is below a simmer |
Once the water looks right, crack the egg into a small ramekin or prep bowl. Do not crack it directly into the pot. The ramekin does two important things. It lets you check the egg first and control how it enters the water.
A fresh egg will sit high in the ramekin, with a thick white gathered close to the yolk. An older egg will spread quickly and look watery at the edges. That tells you what to expect before the egg goes in.
To add the egg, lower the ramekin until its lip just touches the water’s surface. Then tip the egg in gently. You are not dropping the egg. You are placing it.
Once the egg is in the water, leave it alone. Within the first minute, the white should begin to turn opaque and gather around the yolk. That is the sign that the temperature is working.
If the water begins bubbling, lower the heat immediately. If the white spreads slightly, wait before touching it. One gentle nudge with a spoon can help guide the white back toward the yolk, but repeated stirring will only damage the shape.
| White turns opaque and gathers within the first minute | Temperature is working | Leave it alone and begin timing |
| White spreads slowly and looks flat | Water may be slightly cool, or egg may be older | Give one gentle nudge if needed |
| Water begins bubbling after the egg goes in | Heat is too high | Lower the heat or pull the pan partly off the burner |
| White scatters into thin threads immediately | Water was too hot, or egg was too old | Start again with calmer water and a fresher egg |
Doneness should be read visually, not solely by timer. About 3 minutes is a useful reference for a large egg, but the egg itself provides a better signal.
The white should be fully opaque, with no clear areas remaining. When gently pressed with the back of a spoon, it should feel set yet still tender.
Lift the egg when the white is set, and the yolk still feels soft underneath. Drain it briefly, season it after cooking, and serve right away.
The Mistakes That Produce Watery Whites and Broken Yolks
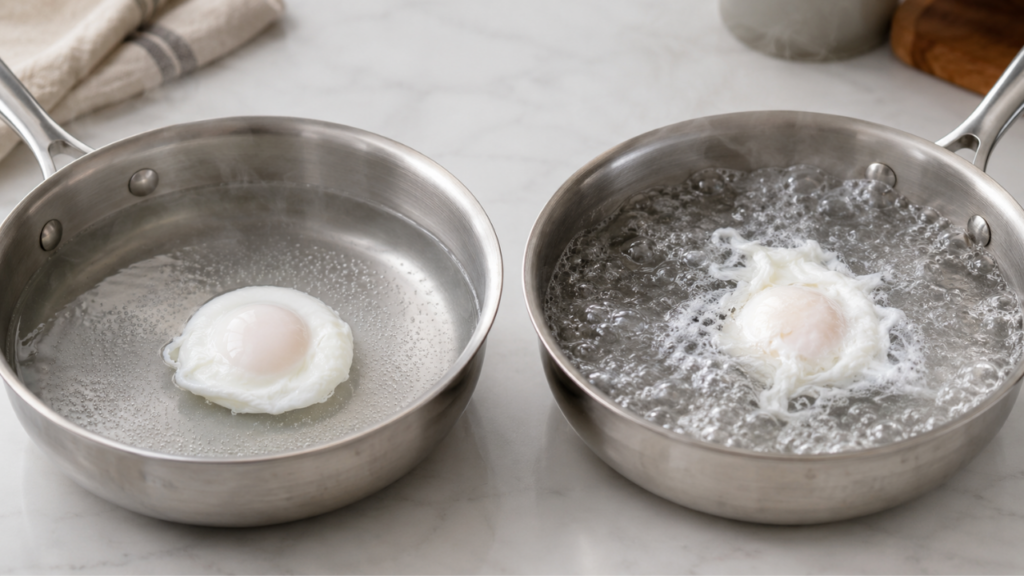
Most poaching failures are not random. They usually come from one of a few predictable problems: the water was too hot, the egg was not fresh enough, or the egg was handled too aggressively before the white had time to set.
Once you know what caused the problem, the correction becomes much simpler.
| Water is boiling or actively simmering | The white tears into wispy threads and the yolk may break | Turbulence pulls the white apart before it can coagulate | Bring the water up to heat, then lower it until the surface is calm before adding the egg |
| Egg is not fresh enough | The white spreads wide and looks loose or ragged | Older egg whites thin out and do not hold tightly around the yolk | Use the freshest eggs available and check the egg in a ramekin before poaching |
| Egg goes in straight from the refrigerator | The white sets less evenly and timing becomes harder to judge | A cold egg cools the water around it on contact | Let the egg sit out for 15 to 20 minutes when possible |
| Egg is cracked directly into the pot | The yolk can break and the white disperses on impact | The egg drops too far and enters the water without control | Crack into a ramekin first, then slide the egg in gently |
| Egg is stirred or moved too early | The white tears or reshapes before it has structure | The white is fragile during the first minute of cooking | Leave the egg alone; use only one gentle nudge if needed |
Common Misconceptions to Correct
You do not need a strong vortex. A vigorous swirl creates turbulence, and turbulence is what you are trying to avoid. A very gentle swirl can sometimes help with a fresh egg, but calm water is more reliable.
Salt does not solve the problem. Salt does not meaningfully help the egg white set in a poaching bath. Season the egg after cooking.
A deeper pot is not better. A wide, shallow pan gives you better visibility and makes it easier to lift the egg without damaging it.
Vinegar is not a rescue tool for bad technique. Vinegar can help a slightly loose white set faster, but it cannot fix boiling water, an old egg, or rough handling.
Chef’s Note
Almost every poaching mistake begins before the egg enters the water. Choose the freshest egg you can, crack it into a ramekin, wait until the water is calm, and place the egg gently into the water. Once it is in the pan, stillness does more for the egg than interference.
Vinegar in the Water: What It Does and When It Helps
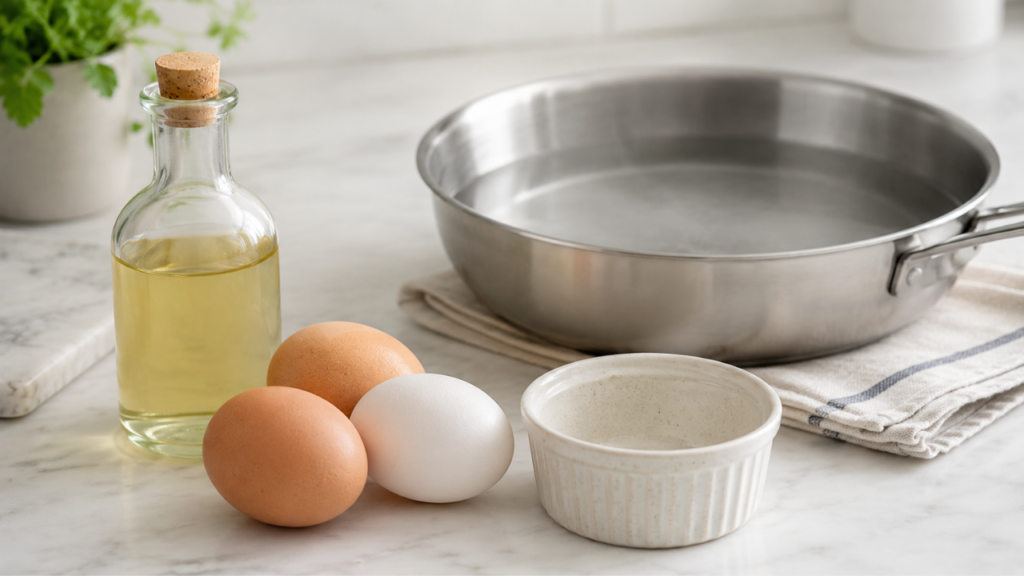
Many poached egg instructions tell you to add vinegar to the water. That advice is not wrong, but it is often treated as a rule rather than a tool.
Vinegar helps egg whites set a little faster. The acid encourages the outer white to coagulate sooner, which can help the egg hold together in the first few seconds after it enters the water.
That matters most when the egg is not very fresh. A fresh egg has a thick white that stays close to the yolk. An older egg has a thinner white that spreads more easily. Vinegar can give that loose white a small advantage, helping it gather before it disperses into the water.
But vinegar has limits. It will not fix boiling water. It will not rescue an old egg with watery white. It will not make up for dropping the egg from too high an altitude.
It only helps with one specific problem: a white that needs a little assistance setting quickly.
| The eggs are not as fresh as you would like | The white is looser and benefits from faster setting |
| You are poaching several eggs | The extra help can improve consistency |
| You are using a larger volume of water | The egg may spread more before the white sets |
| The finished dish has enough flavor | A faint acidic note will be less noticeable |
| The eggs are very fresh | The white already holds together well |
| The dish is delicate | Even slight acidity may be noticeable |
| You are poaching in broth, tomato sauce, or another flavored liquid | The added acid may interfere with the flavor |
| Your results are already consistent | There is no need to add another variable |
When you do use vinegar, use a small amount. About 1 teaspoon of white wine vinegar per liter of water is enough. More than that can leave a sour note on the edge of the white.
White wine vinegar is the best choice because its flavor is mild and clean. Distilled white vinegar also works, but it tastes sharper. Avoid strongly flavored vinegars like red wine vinegar, malt vinegar, or apple cider vinegar unless you specifically want their flavor in the dish.
Chef’s Note
Vinegar is an assist, not the technique. Fresh eggs, calm water, and gentle placement matter more. Use vinegar when conditions call for it, not because every poached egg automatically needs it.
Adjusting for Egg Freshness, Volume, and Batch Cooking

- 【Stainless Steel Material】The metal spoon set is made of high-quality 18/0 thickened stainless steel, which is built to …
- 【Two-piece Design】Get two essential cooking tools in one set! The solid spoon is perfect for scooping soup, stew, rice, …
- 【Practical Design】The long handle of the metal spoon and slotted spoon with heat-proof design that make the handle more …
The basic principle of poaching remains the same. The water still needs to be gentle. The egg still needs to be placed carefully. The white still needs time to set before the egg is moved.
What changes is the amount of help the egg needs before it reaches the water.
Egg freshness matters because the white changes as the egg ages. A fresh egg has a thick white that stays close to the yolk. An older egg has a thinner white that spreads more easily.
That does not always mean the egg is unusable, but it does mean you need to adjust your expectations and your technique.
| Very fresh | Thick white sits high and close to the yolk | Ideal for poaching; vinegar is usually unnecessary |
| Moderately fresh | White spreads slightly but still holds around the yolk | Still workable; use calm water and consider a small amount of vinegar |
| Loose white | Thin white spreads quickly in the ramekin | Use vinegar and consider straining off the thinnest white through a fine-mesh sieve |
| Very watery white | White runs immediately to the edges of the ramekin | Better used for scrambling, baking, or hard-cooking |
Cracking the egg into a ramekin is the easiest way to judge this. You do not need to guess from the shell. Once the egg is open, the white tells you whether it is ready to be poached.
Batch Cooking Poached Eggs
When cooking more than one or two poached eggs, do not crowd the pan. Too many eggs lower the water temperature, make the pan harder to read, and increase the chance that the eggs will touch or tear.
For better control, poach in small batches. Cook only two or three eggs at a time. Use a wide, shallow pan so each egg has space. If you need more eggs, use a second pan or work in batches.
Pull the eggs slightly early. If the eggs will be held and reheated, remove them a little before your ideal final doneness. They will firm slightly as they sit and warm again.
Transfer them to cold water. Move the poached eggs into a bowl of cold water to stop the cooking. This keeps the yolks from continuing to set.
Reheat gently. To serve, slide the eggs into hot water around 140°F to 150°F / 60°C to 65°C for 30 to 60 seconds. This warms the egg without pushing the yolk further toward a set texture.
| Cold water; hold for short service | Reliable for brunch-style timing; stops cooking and keeps the eggs intact |
| Refrigerated water; hold overnight | Useful for advance prep; reheat gently before serving |
| Warm water; hold for more than a few minutes | Not ideal; the eggs continue to cook slowly |
| Holding on a warm plate | Poor choice; edges dry out and yolks continue to firm |
The important distinction is this: poaching water cooks the egg; reheating water warms it.
Those are not the same job. If you reheat held eggs in water that is too hot, you continue cooking the yolk and lose the soft center you worked to preserve.
What to Remember Every Time You Poach
Poaching becomes easier when you stop treating it as a trick and start treating it as a short list of controllable decisions. The details matter, but the technique comes back to five principles.
- Keep the water below a simmer. Poaching is low-temperature cooking. For eggs, the target range is about 160°F to 185°F (71°C to 85°C). The surface should be calm, with small bubbles forming slowly at the bottom of the pan.
- Use the freshest eggs you can. Fresh eggs have thicker whites that stay close to the yolk. Older eggs have looser whites that spread more easily in the water. Crack the egg into a ramekin first so you can judge the white before it goes into the pan.
- Read the egg, not just the timer. A timer is helpful, but doneness is visual and tactile. The white should be fully opaque and feel set yet tender when gently touched with the back of a spoon.
- Avoid turbulence. Boiling water pulls the white apart. Dropping the egg from too great a height can break the yolk. Stirring too much disrupts the white before it has structure. Calm water and gentle placement do most of the work.
- Use vinegar only when it helps. Vinegar is not required for every poached egg. It can help a slightly loose white set faster, especially when the egg is not very fresh. Treat it as an assist, not the technique.
| Water temperature | 160°F to 185°F / 71°C to 85°C |
| Water movement | Calm surface, slow bubbles, no active simmer |
| Egg freshness | Fresh egg with a thick white that holds close to the yolk |
| Entry method | Crack into ramekin, lower close to surface, slide in gently |
| During cooking | Do not stir; one gentle nudge only if needed |
| Doneness | Fully opaque white, tender set, soft yolk |
| Vinegar | Optional; useful for slightly older eggs |
| Batch cooking | Poach in small groups, chill in cold water, reheat gently |
Frequently Asked Questions About Poached Eggs
These are the questions that come up most often when poached eggs do not behave the way a cook expects.
Does the water need to be salted for poaching?
No. Salt does not meaningfully help the egg white hold together in poaching water. Season the egg after cooking instead. A small pinch of salt over the finished egg does far more for flavor than salt in the water.
Can poached eggs be made ahead of time?
Yes. This is how many kitchens handle poached eggs for service. Poach the eggs slightly underdone, then transfer them to cold water to stop the cooking. Keep them submerged in cold water in the refrigerator for up to 24 hours. To serve, reheat them in hot water around 140°F to 150°F / 60°C to 65°C for 30 to 60 seconds. The goal is to warm the egg, not continue cooking it.
Why do my whites spread into wispy threads?
Usually for one of three reasons. The water was too hot, the egg was not fresh enough, or the egg was dropped into the pan from too high. Any one of those can cause the white to spread before it has time to set. Use fresher eggs, keep the water calm, and slide the egg in gently from a ramekin.
Is the swirl method effective?
Sometimes, but it is not the most reliable method. A gentle swirl can help a fresh egg gather, but a strong vortex creates turbulence. That turbulence can pull the white apart, especially if the egg is older or the water is too active. For most home cooks, calm water and a fresh egg are more dependable than a swirl.
How do I know when the egg is done without cutting it open?
Use two cues together. The white should be fully opaque, with no clear or watery areas around the yolk. When gently touched with the back of a spoon, it should feel set yet still tender. For a large egg, this often takes about 3 minutes, but the egg itself is a better guide than the timer.
Does the size of the pot or pan matter?
Yes. A wide, shallow pan is usually better than a deep, narrow saucepan. Width gives the egg room to settle and improves your visibility. A shallow pan also makes it easier to lift the egg without folding or tearing the white. About 3 to 4 inches of water is enough.
Can I poach eggs in something other than water?
Yes. Eggs can be gently cooked in tomato sauce, broth, wine, cream, or other liquids. The same principle applies: the liquid should be hot but gentle. If the liquid boils aggressively, it can toughen the egg or break its shape. Thicker liquids, like tomato sauce, may heat unevenly, so keep the heat moderate and watch for hot spots.
Kitchen Tools That Support This Concept

Poached eggs do not require specialized equipment. A pan, a small bowl, and a spoon are enough.
The right tools simply make the technique easier to control. Each one supports a specific part of the process: reading the water, placing the egg, and lifting it cleanly.
Instant-Read Thermometer
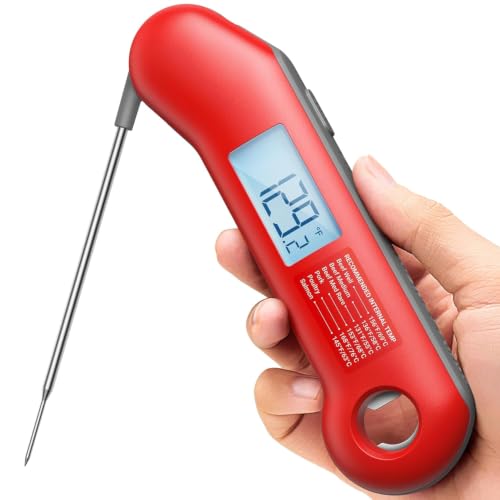
Poaching depends on water temperature. An instant-read thermometer removes the guesswork as you learn what the correct water looks like. Use it to confirm that the water is in the poaching range: about 160°F to 185°F / 71°C to 85°C.
This is especially helpful when you are using an unfamiliar burner, cooking several eggs, or trying to understand the difference between poaching, simmering, and boiling.
Small Ramekin or Prep Bowl
A ramekin is one of the most important tools for poaching eggs. Crack the egg into the ramekin first. This lets you check the yolk, assess the freshness of the white, and gently place the egg into the water.
Lower the ramekin close to the surface before tipping the egg in. The goal is to slide the egg into the water, not drop it.
Wide, Shallow Pan
A wide, shallow sauté pan or straight-sided skillet gives you better control than a deep saucepan. The wide surface gives each egg room to settle. The shallow depth makes it easier to see what is happening and lift the egg without folding or tearing the white.
For most home kitchens, a 10 to 12-inch pan with a few inches of water works well.
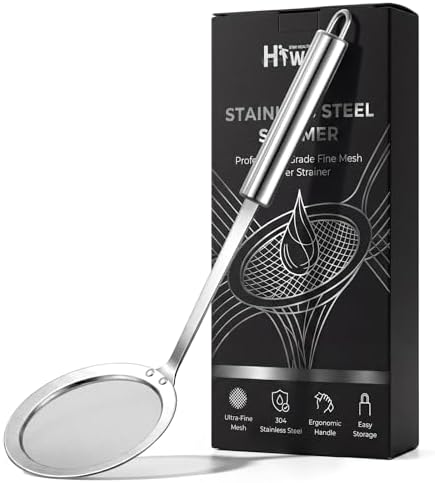
Slotted Spoon or Fine-Mesh Skimmer
You need a tool that supports the egg while letting water drain away. A standard slotted spoon works.
A fine-mesh skimmer also works well, especially if the egg is delicate. The important thing is that the spoon can lift the egg gently and drain it quickly before plating.
| Silicone poaching cups | They steam the egg instead of poaching it directly in liquid |
| Egg poaching pans with fitted cups | Useful for a different texture, but not the same as traditional poaching |
| Specialty poaching spoons | A regular slotted spoon or skimmer is usually enough |
| Strong vortex tools | Technique matters more than creating a swirl |
The main point is simple: tools can support poaching, but they cannot replace the technique. Calm water, fresh eggs, gentle placement, and careful lifting matter more than specialized equipment.
One Principle, Consistent Results
Poaching an egg is not a difficult technique. It is a precise one.
Most poaching problems stem from a misunderstanding of the water. If the water is too hot, the egg scatters or tightens. If the water is calm and controlled, the white has time to set gently while the yolk stays soft at the center.
That is the principle behind the whole method: control the heat, protect the egg, and let the water do its work.
Once you understand that, the smaller decisions become easier. You know why fresh eggs matter. You know when vinegar helps. You know why the egg should be placed gently instead of dropped. You know why a timer helps, but the white texture tells you more.
That understanding also transfers. It applies when the cooking liquid is tomato sauce instead of water, when you are making several eggs for brunch, or when a recipe asks you to cook eggs gently in broth. The dish may change, but the principle stays the same.
If this concept is new, start with one fresh egg, a small ramekin, and calm water. Watch the surface, watch the white, and lift the egg when it is set but still tender. That single practice run will teach you more than memorizing a long list of rules.
Kitchen Know How Mailing List
More technique, less guesswork, delivered to your inbox.
Kitchen Know How articles go deeper than recipes. Each one explains how a technique works, why it matters, and how to apply it across the food you actually cook. No filler, no entertainment, just clear, chef-led instruction you can use.